Publishing book with Emacs and OrgMode

I coauthored my first book — Problem Solving with Python Programming 1. The book was written entirely in GNU Emacs using Org mode and exported as PDF using LaTeX. As a way of filling the empty blog and also to thank the open source communities behind the software, I decided to write this article.
Brief About The Book (Can be skipped)
The book is written for the courses GE3151 Problem Solving and Python Programming and
GE3171 Problem Solving and Python Programming Laboratory of
Anna University. The syllabus is more about problem
solving than Python and being a course mandatory for all the engineering branches (so not just
Computer Science and Engineering), it doesn’t touch the deeper realms of Python like Object Oriented
Programming (OOP) etc.
If you did the course wholeheartedly, then you would be able to replace Python as your desk calculator and use it as a handy tool for housekeeping tasks like mass editing of files etc.
We sticked best to the syllabus because
- We didn’t want to overwhelm the reader (a student or teacher) with full blast of Python.
- The important excuse — the book with the stick to syllabus philosophy itself drew about 500 pages. Adding more to it will increase the pages which proportionally increases the cost of the book.
However for the chapters I wrote and code snippets I did, I tried my best to advocate the principles I have learnt so far in my journey of using Python (my favorite programming language).
It Started In My First Year
It started in the year 2020, when I finished my school and entered Anna University Regional Campus Coimbatore for Bachelors of Engineering (B.E.) in Computer Science and Engineering (CSE). I happen to be lucky to have my class advisor as the Python course instructor — Dr. Preethi J.
Having learnt Python since my school days and also using Debian GNU/Linux, I was one of the very few in my class who signed up for B.E. CSE because of interest in computer science than other reasons like job availability, easy to graduate etc. If I wanted to write my college story, then it would be as lengthy as a book, but that is not what the article is about. So let’s move forward.
Because that I was the Class Representative during the first year, I established a good name in the college. Once I had to meet my class advisor Dr. Preethi J for something and that’s when she asked — “I and your senior Akila are writing a book on Python, would you like to join us?”.
Akila; she was my senior and I had already met her during the online senior-junior meet-up (yes it was during the pandemic, so Google Meet). Being someone who doesn’t easily say No — I accepted the invite.
How To Write A Book?
We divided the syllabus. I was to write a unit (the syllabus contains 5 units) and do the laboratory manual. I was in home (actually I was in home only for the first and half a year because of the pandemic) and free of any classes because of semester holidays. It was the time to start writing. But how?
Yes really, how do you write a book? I mean what software should you use? I have used Libre Office, Scribus, LyX etc. since my childhood but I was confused which one would be perfect. I was in no position to use Microsoft Word because I can’t install Windows on my laptop and I can’t pay for the software either. The online version needs a Microsoft account; which means — No thanks, I will use something else.
I already dropped Scribus because I didn’t remember doing anything usefully in it beyond some
samples. So the first one in the list is Libre Office. The biggest advantage of LO is that it is
free and open source. The other authors can also install it on their Windows OS. Moreover, if they
decide to use Microsoft Word, I can import the .docx file in Libre Office. So in terms of
collaboration, it is a perfect tool. Next the graphical user interface means easy to learn (actually
it is discover-ability).
But I really didn’t like to use Libre Office to write a book. It felt too fragile.

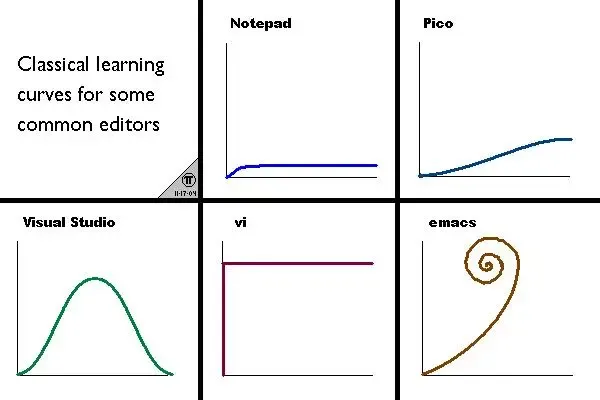
The meme applies for Libre Office too in my opinion. Moreover, having to click around the UI for everything felt annoying when you needed the same configuration in another document. Because if you used a base template for all documents and decided to make a small change in the template, now you have to make the change in all the documents too.
But apart from all these, the most important showstopper for me was that I didn’t manage to get syntax highlighting to work in Libre Office. I tried a bunch of add-ons and solutions of Stack Overflow but they didn’t work. What is a programming book without syntax highlighting? 🤷
Here Comes Emacs
So now the option is to consider LyX. But. This is where a few brain cells left in me woke up and said — Hey! If you are going to use LyX, why not use Emacs itself?. The beauty of LyX is that it gives you the beautiful LaTeX typeset PDF without having to learn LaTeX. But if that was it, Org mode can do it already. Instead of having to install a Qt application in my GNOME/Sway desktop, I can simply use my existing Emacs installation. I was already a diehard Emacs follower thanks to Doom Emacs and the open source community in general. So using Emacs should be easy for me.
Honestly speaking, looking back at the moment, the reason I chose Emacs that time is because of laziness to install LyX and the voice inside me that kept saying — Dude simply start writing, you can shift to other tools when needed. But now if you ask me if the choice was right — I can stand up and shout a BIG YES!.
Yes, using Emacs came with a massive set of advantages that was not visible at the time of choosing. I have summarized it in the last sections.
So Org mode and LaTeX
Jokes aside, I’m not a power user of Emacs in any way. I have been able to use Emacs because of Doom Emacs, which takes care of providing an amazing workflow. I don’t write Elisp and my configuration (on-top-of Doom Emacs) is hardly ten lines I copied from various blogs and solutions to provide CUA Mode, enable paragraph filling etc.
The next big thing is Org mode. I have used it just because I have seen people making miracles with
it. I tried maintaining a TODO or Agenda via Org mode but it failed. However I do use
Orgzly in my phone to remind me of birthdays, but that’s a different story. I
have exported Org files to PDF using pdflatex (available in Emacs via C-c C-e l p). The beauty
of LaTeX with the best text-editing features provided by Emacs, makes Org mode a killer software.
I accept, the experience of using Org mode was not butter-smooth. I occasionally messed up
indentation (Org mode uses indentation!) and had to switch to text-mode or open up the file in
another text editor to fix the issue. Learning Org mode syntax and keybindings took its own time.
Once I look up and use it, I felt confident but after an hour or day passes, I forgot the
keybindings or syntax and had to look up again. In short, the muscle memory took a long time to
build up.
LaTeX? Don’t ask 🙂. I have been able to use LaTeX only because of software like LyX and Org mode. I can proudly say that I know no LaTeX command by-heart before writing the book and also after writing the book. To me LaTeX belongs to the smartest of smartest people (no offense please!) and I don’t think I will learn it any day soon.
Org mode was good enough to hide 99% of LaTeX away from me and the remaining 1% was available by web searches.
Gathering my guts, I wrote my first unit (a single .org file). This is the template I used.
#+TITLE: Unit Name
#+OPTIONS: author:nil date:nil title:nil H:4 num:2

* Heading
… content goes here …
It produced a good looking PDF without the author and date (which was not irrelevant for a book). I
had to tweak the limit of headings via H:4 num:2 because some low-level headings were converted to
definition lists. Obviously this was with time-consuming web searches.
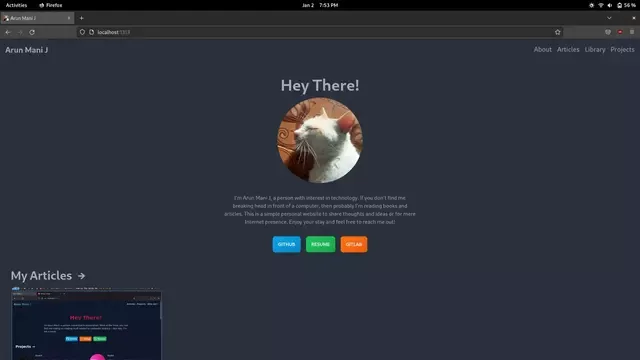
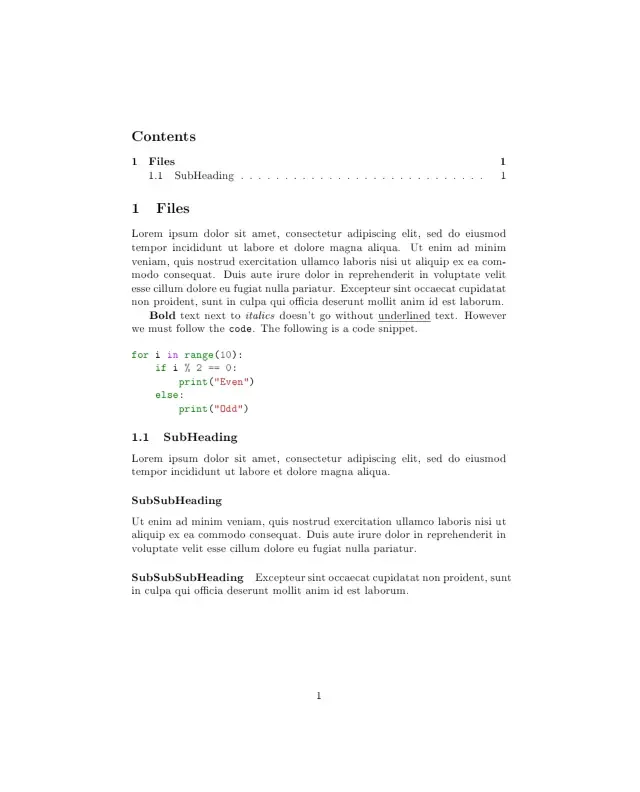
If you used the above template, you did get a page that looks like this.
But if you follow carefully, you must have noted that one of the reasons to leave Libre Office — syntax highlighting, is absent! So we have to enable syntax highlighting in the PDFs exported in Org mode. If you do a web search for Org mode export syntax highlighting, you see helpful Emacs Stack Exchange threads.
So you have to install Pygments and add the following to your Emacs config.
(require 'org)
(require 'ox-latex)
(add-to-list 'org-latex-packages-alist '("" "minted"))
(setq org-latex-listings 'minted)
(setq org-latex-pdf-process
'("pdflatex -shell-escape -interaction nonstopmode -output-directory %o %f"
"pdflatex -shell-escape -interaction nonstopmode -output-directory %o %f"
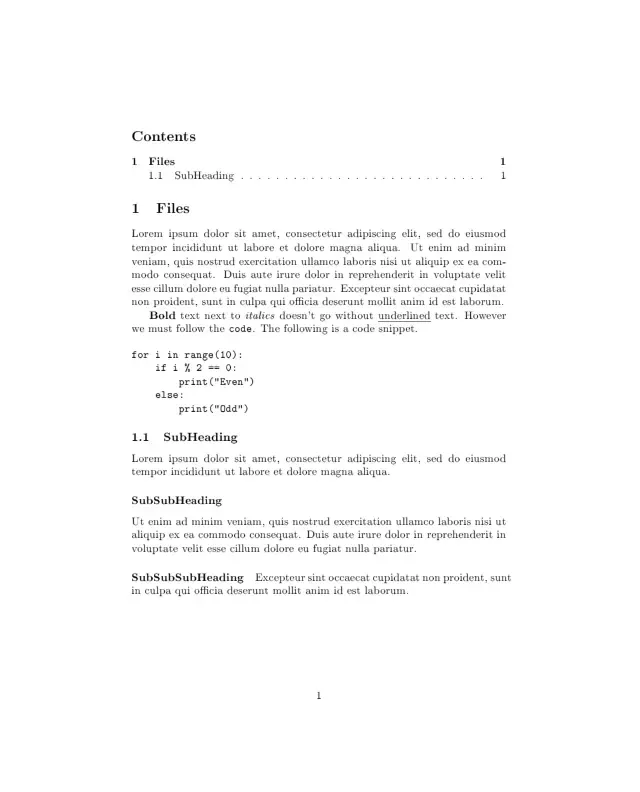
"pdflatex -shell-escape -interaction nonstopmode -output-directory %o %f"))This gives us a syntax highlighted PDF like this.
Shaping for Lab Manual
With the above template, everything worked well for unit. But once I started writing lab manual, it became a little difficult because of two issues:
- Maintenance of programs.
- Creation of flowcharts.
Maintenance of Programs
Though Emacs provided syntax highlighting and automatic indentation while editing code blocks in an Org file, it is very much limited. Once your program goes past hundred lines, you wish there was full-fledged Python environment that provided auto-completion and formatting.
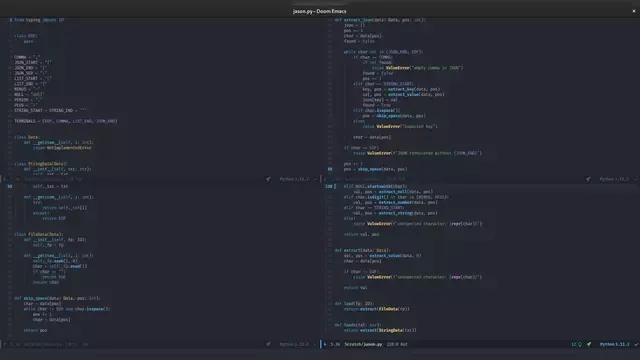
To aid in this task, Org mode has
#+INCLUDE: file.py src python directive that adds
file.py to the Org document as a code block. It means I can edit the file as an ordinary Python
file and while exporting the PDF it will be properly included with all the goodies.
Creation of Flowcharts
Now comes the task of creating flowcharts. For someone who sucks at any kind of artistic creativity, making flowcharts using a GUI tool is very difficult because of the click-click process. I thought it would be great if there was a software that drew flowcharts from a text file containing the rules.
AT&T Labs Research faced the same issue and designed the golden Graphviz. After skimming over a few tutorials and understanding the syntax, I was able to make flowcharts.
Like any other Emacsen, I wanted a way to edit the .gv files inside Emacs and found
graphviz-dot-mode.
One issue, I haven’t been able to resolve in Graphviz yet is making the edges come out of the vertices instead of anywhere in the shape. However I ignored it for all flowcharts except a few. For the few, I used draw.io (and draw.io is great!).
Getting a Publisher
The first year became second year and the second year became third year. We all became busy in our own works and the book writing came to a temporary halt because the syllabus was about to change.
Once the new syllabus came (which luckily had less changes) we thought to hurry up the process. To hurry up means to get a publisher, because once we knew someone is waiting, we would try to finish the work as soon as possible. We tried a few big academic publishers but they were reluctant to accept the proposal because the coauthors were students. Yes. They didn’t accept because they don’t take books from students except PhD students. However they were ready if we agreed that only our professor is the author. Means the book will have only our professor’s name.
Thankfully, our professor didn’t go with it. We then got help from college librarian and got contact of a publisher named Yes Dee.
The company’s managing director and technical editor met us in college and they were really happy to see that the book was written by students. So that was it, they accepted our proposal and we signed the contracts.
After many topics, our discussion came to the manuscript format. Our professor pointed to me and said that I’m using LaTeX to type the book. I took my laptop and showed them the units and lab manual I have written so far.
The publishing team said that since I knew LaTeX already, they would give me the guidelines for the book like fonts, layout, dimensions and I was to give them the final PDF as per the guidelines.
Yes 🙂. They assumed I know LaTeX. I till, the moment of the very sentence, thought that we can submit the manuscript is any legible format and publisher would take care of shaping it to the right layout.
May be my assumption was wrong or it was my luck, I do not know. I didn’t deny the offer because of two reasons:
- If I denied because I don’t know LaTeX then my professor would be upset because I had convinced her LaTeX is the best option over Microsoft Word. I promised her that I would take care of any issues arising due to this choice.
- I felt that if I did the formatting then I can make any changes required to their guidelines wherever deemed fit.
Whatever it was, I accepted and we were to submit the final PDF in a month. I still told them that I don’t know LaTeX much and they said they will help me. 😁
Sudden Fear
Since I was supposed to format and submit the PDF, I was stuck by fear and doubt if I will be able to do it. I didn’t use LaTeX directly but LaTeX on top of Org mode. So every issue I face has to be first checked against Org mode and then LaTeX.
This was the moment, on a fine Sunday, I was questioning myself if by using Org mode I have made the biggest mistake. Had I used LaTeX directly, then I can ask in LaTeX forums directly but with having Org mode as an interface I had to explain them Org mode too, which might affect the answers.
So I thought — okay, let us use LyX. Org mode already produced .tex files during PDF export, I
thought of importing them in LyX and drop the dependency of having to use Emacs completely. I also
convinced myself that it would allow other coauthors to collaborate as it is easy for them to use
LyX than learn and use Emacs.
Importing the .tex file didn’t go smooth though. Some LaTeX commands inserted by Org mode didn’t
compile in LyX. And I was already counting my luck. Okay! A new idea comes. Let us copy paste the
paragraphs into a new LyX file itself and make the necessary formatting. It is a tedious job but I
forced myself to do it. I tried a chapter but couldn’t go through it. Clicking the buttons, enabling
syntax highlighting and so and so, it was a pain.
I gathered hope again. No, stop it. I told myself that whatever it is, I will stick to Emacs and finish it. If I couldn’t do it, I will let the publisher know. I don’t know what gave me that hope but it worked! Importing the entire book into LyX itself would have taken a week (remember, I have classes from 9 AM to 5 PM and other works too) and could have caused more harm than good.
Back to Emacs.
Merging Chapters
A lot changed after we met the publisher. Our professor said that breaking the five units into individual chapters would be a good idea. I agree because they are more easy to follow than grasping an entire unit. As the other coauthor was busy with her placements and I was assigned two more units. My professor said she will take care of solved questions and exercises for every chapter.
Writing has never been an issue for me, if needed I could have written the entire book because Python is my favorite language and I loved writing about it.
But, merging other people’s work was very hectic. It was .docx files from the other coauthors. I
opened them in Libre Office, copy pasted them in .org file and reformatted them. This I did
paragraph by paragraph. Copy in Libre Office. Paste in Emacs. Reformat the paragraph and replicate
the bold, italics etc. Repeat.
Sometimes the .docx files had images and I had to save them using Libre Office
Right Click -> Save and then insert it in Emacs. Images come with their own headaches. I had to
resize the image and make sure its placement doesn’t affect the other text.
A little by little, I converted all the Word files to Org. After making the changes, I emailed the chapters to the editor at the publishing company. The editor, she must have had a lot of patience, reading through the text and marking up the changes. I on the other hand, fixed them. The grammatical corrections were easy. The changes regarding layout were trouble. It means I had to step into LaTeX world and hunt for the commands. It was a nightmare. This process went for around three times I think.
Final Steps
I created all the pages from the front page, copyright, acknowledgments to chapters in Org mode and exported them as PDFs. I then combined the PDFs together using Ghostscript.
After ensuring that all the corrections have been made, the book went for printing. After a month, we received the authors’ copies last week. It felt so great to have your time and efforts as a physical item in your hands.
I smiled at the book and told myself — Yes! I did it. I did it using Emacs and Org mode. It is not a flex but a reminder that I did that even though I doubted myself. Looking back, it feels like a lovely nightmare. 🙈
The Right Choice
Did I make the right choice by using Emacs and Org mode instead of something else? With the book in my hand, I can say yes. Doing it this way gave its own set of advantages.
Everything is text. Org files are text files, they can be edited in any text editor, though Emacs has the best interface to interact with Org files. Text is the universal format. Because of this fact, I was able to edit the Org files in various ways. Like, I could do some complicated search and replace using Python etc.
The best of all is that any change in template is just addition or removal of few lines of text. So I can simply copy paste it in all the files. Add this to the powerful Emacs commands, you have everything in your reach.
Now compare it with using word processors like Libre Office. I think they save their files in some form of XML. Every change would be accompanied with a number of mouse clicks, pop-ups, menus etc. Going from the simple text format to a word processor would have been like tying my hands.
But every advantage comes with its own disadvantage. Using Emacs made it a sort of vendor lock-in. Only I could do the formatting work because the other coauthors used Windows. Installing Emacs, LaTeX in Windows and making them learn it might be difficult.
During the corrections phase, my senior and coauthor Akila helped with grammatical corrections. I asked her to install VSCode Org mode plugin to at least get the syntax highlighting of Org files. But she was limited to grammatical corrections. Anything beyond like layout or formatting needed LaTeX knowledge, so I had to it. This way I ended up being the pressure bearer.
May be if there was a web app of Emacs with all the goodies, it could have helped but none existed when I searched.
The next disadvantage is that most of the commands, Elisp code I used where blind copy-paste with a very little knowledge of what’s happening underneath. If something broke, I had to search the error and fix it. Because I didn’t know LaTeX or Org mode well, it was a slow process.
Had there been a major version upgrade in LaTeX or Org mode such that the commands from five to ten years old didn’t work, then I would have been in a BIG TROUBLE.
But luckily nothing of that sort happened. Good software lasts long. Emacs and LaTeX did for me. I’m happy for them.
Technical Details
If you wanted me to shut up and show the code, then there you go. I will try my best to explain the commands and organization of the source files.
Setting up Emacs
I used Doom Emacs. Though I haven’t tried, nothing I did is exclusive to Doom Emacs and should work with other variants too as long as Org mode exists.
Setting up LaTeX
The next step is to install LaTeX. The way of installation depends upon your OS. I started from a standard install and installed extra packages as needed. If you are using Debian GNU/Linux, then the following command should suffice.
sudo apt install texlive texlive-latex-extra texlive-plain-generic --no-install-recommendsI have added --no-install-recommends to avoid cluttering with unnecessary packages like X11 tools.
Miscellaneous Packages
Once you have installed LaTeX, you need to install some other helpful packages.
sudo apt install ghostscript imagemagick mupdf-tools python3-pygments- Ghostscript for merging PDFs.
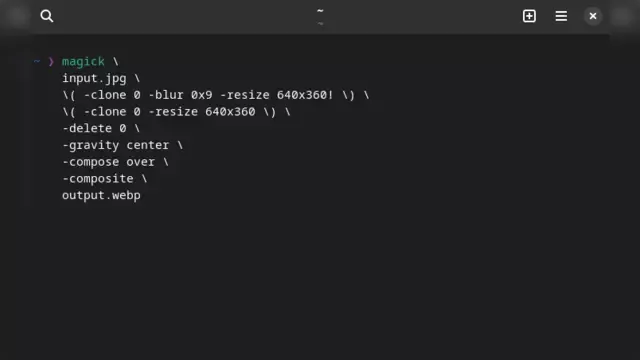
- ImageMagick for editing images.
- MuPDF for extracting table of contents.
- Pygments for source code highlighting.
Enabling Syntax Highlighting
To enable syntax highlighted code blocks in PDFs, you need to add the following lines to your Emacs config.
(require 'org)
(require 'ox-latex)
(add-to-list 'org-latex-packages-alist '("" "minted"))
(setq org-latex-listings 'minted)

(setq org-latex-pdf-process
      '("pdflatex -shell-escape -interaction nonstopmode -output-directory %o %f"
        "pdflatex -shell-escape -interaction nonstopmode -output-directory %o %f"
        "pdflatex -shell-escape -interaction nonstopmode -output-directory %o %f"))
Organization
I wrote each chapter in a separate Org file. The advantage is easy to maintain but the disadvantage is that I had to manually set the page number of the first page and then merge them properly.
The Template
The .org file I used as template for all the chapters is as follows.
#+title: 4 Control Flow
#+LATEX_CLASS: extarticle
#+LATEX_HEADER: \usepackage[paperwidth=152.4mm,paperheight=228.6mm]{geometry}
#+LATEX_HEADER: \geometry{verbose,tmargin=25.95mm,bmargin=19.3mm,lmargin=16.2mm,rmargin=16.2mm}
#+LATEX_HEADER: \setcounter{page}{143}

#+LATEX_HEADER: \usepackage{minted}
#+LATEX_HEADER: \usemintedstyle{bw}
#+LATEX_HEADER: \setminted{frame=lines,breaklines=true}

#+LATEX_HEADER: \usepackage{fancyhdr}
#+LATEX_HEADER: \pagestyle{fancy}
#+LATEX_HEADER: \fancyhf{}
#+LATEX_HEADER: \fancyhead[LE]{Problem Solving and Python Programming}
#+LATEX_HEADER: \fancyhead[RE]{\thepage}
#+LATEX_HEADER: \fancyhead[LO]{\ifnum \thepage=143 \textbf{\Huge{4}} \else \thepage \fi}
#+LATEX_HEADER: \fancyhead[RO]{\ifnum \thepage=143 \textbf{\Huge{Control Flow}} \else Control Flow \fi}

#+LATEX_HEADER: \renewcommand*{\thesection}{4.\arabic{section}}
#+OPTIONS: author:nil date:nil toc:nil title:nil H:4 num:2

#+LATEX_HEADER: \tolerance=1
#+LATEX_HEADER: \emergencystretch=\maxdimen
#+LATEX_HEADER: \hyphenpenalty=10000
#+LATEX_HEADER: \hbadness=10000

* Verbatim
#+begin_src text
Monospaced Text
#+end_src

* Code
#+begin_src python
for i in range(10):
    print("Hello World")
#+end_src

* Unnumbered Heading
:PROPERTIES:
   :UNNUMBERED: t
:END:
Let us go through it part by part.
#+title: 4 Control Flow
#+LATEX_CLASS: extarticle
#+LATEX_HEADER: \usepackage[paperwidth=152.4mm,paperheight=228.6mm]{geometry}
#+LATEX_HEADER: \geometry{verbose,tmargin=25.95mm,bmargin=19.3mm,lmargin=16.2mm,rmargin=16.2mm}
#+LATEX_HEADER: \setcounter{page}{143}
The first line sets the chapter title. Next to it we set the LaTeX class to
extarticle which allows extra
font sizes. See this
post for
more details.
Then we set the page dimensions followed by the margin at each side. The top margin is more than bottom margin because top of the page contains the chapter header. (Reduce it and see, to know what I’m saying). Finally we set the page number of the first page in the chapter.
Determining the page number is a two-way process. First you compile all the chapters with page counter as 1. This way you get to know how many pages each chapter has and note it down in a file. After that, you set the page counters to the values noted.
#+LATEX_HEADER: \usepackage{minted}
#+LATEX_HEADER: \usemintedstyle{bw}
#+LATEX_HEADER: \setminted{frame=lines,breaklines=true}
Here we tell LaTeX to use minted for code snippets. This will
take care of printing the code with syntax highlighting. I’m using black and white bw style
because the book would be printed in black and white. Then we put each code block between two lines.
breaklines=true makes sure LaTeX breaks the lengthy lines into newlines (that is wrapping)
instead of letting them run past the margin.
#+LATEX_HEADER: \usepackage{fancyhdr}
#+LATEX_HEADER: \pagestyle{fancy}
#+LATEX_HEADER: \fancyhf{}
#+LATEX_HEADER: \fancyhead[LE]{Problem Solving and Python Programming}
#+LATEX_HEADER: \fancyhead[RE]{\thepage}
#+LATEX_HEADER: \fancyhead[LO]{\ifnum \thepage=143 \textbf{\Huge{4}} \else \thepage \fi}
#+LATEX_HEADER: \fancyhead[RO]{\ifnum \thepage=143 \textbf{\Huge{Control Flow}} \else Control Flow \fi}
It is time to style the headers of each page using fancyhdr. The layout of the header is simple. The publisher told me that every new chapter should start at the right hand side. If the chapter ends in right, then I was supposed to add a blank page, so that the next chapter starts in the right.
In the configuration above, L means left, R means right, E means even and O means
odd. The header is divided into three parts — left, center and right. This header can be in an
even page or odd page.
If you use right-odd numbering system (where the right hand side contains odd page numbers), then every new chapter will be on an odd page. So the layout I used is as follows:
- On every even page (left hand side), put the book title at the left corner and the page number at the right corner.
- For every odd page,
- If the page is the starting page of a chapter
\ifnum \thepage=143, then we put the chapter number at the left corner and chapter name at the right corner in a huge font size. - Else, the page number at the left corner and chapter name at the right corner.
- If the page is the starting page of a chapter
Here 143 is the page number at which the chapter starts and has to be set properly as we did with
the page counter.
#+LATEX_HEADER: \renewcommand*{\thesection}{4.\arabic{section}}
#+OPTIONS: author:nil date:nil toc:nil title:nil H:4 num:2
The first command adds 4. to every section number. Here the number 4 denotes the chapter number.
So sections in this chapter come out like 4.1, 4.1.1, 4.2 etc.
The next command turns off displaying of author, date, table of contents and title. Then it sets the depth of sections.
#+LATEX_HEADER: \tolerance=1
#+LATEX_HEADER: \emergencystretch=\maxdimen
#+LATEX_HEADER: \hyphenpenalty=10000
#+LATEX_HEADER: \hbadness=10000
All these four commands work toward one common goal — to prevent hyphenation of words altogether. This was a requirement from the publisher. These commands made sure that if a word had to be hyphenated, then it must be in the next line without any breakage.
* Verbatim
#+begin_src text
Monospaced Text
#+end_src

* Code
#+begin_src python
for i in range(10):
    print("Hello World")
#+end_src

* Unnumbered Heading
:PROPERTIES:
   :UNNUMBERED: t
:END:
These are not part of the template but to help me remember the syntax for frequently used content.
The important one is :UNNUMBERED: t which made sure that the corresponding heading isn’t numbered
in the output. It was necessary for the headings like solved questions and exercises at the end of
the chapter, which shouldn’t be numbered.
Creating Table of Contents
The issue with table of contents and other front matter is that they use Roman numbering. Because of
this, \ifnum \thepage=143 command to set the header depending upon the value of page number
(\thepage) doesn’t work with Roman numbers.
I tried searching the web but didn’t find any solution that works with fancyhdr. Since the number
of pages is less in number, I split the ToC into two Org files. The first Org file has a header and
the other Org file do not.
For the listings of the chapter itself, I merged all the chapters using Ghostscript and then extracted the table of contents using MuPDF. Then I used a Python script to convert the ToC to the section listings.
#+title: Table of Contents
#+LATEX_CLASS: extarticle
#+LATEX_HEADER: \usepackage[paperwidth=152.4mm,paperheight=228.6mm]{geometry}
#+LATEX_HEADER: \geometry{verbose,tmargin=25.95mm,bmargin=19.3mm,lmargin=16.2mm,rmargin=16.2mm}
#+LATEX_HEADER: \pagenumbering{roman}
#+LATEX_HEADER: \setcounter{page}{7}

#+LATEX_HEADER: \usepackage{fancyhdr}
#+LATEX_HEADER: \pagestyle{fancy}
#+LATEX_HEADER: \fancyhf{}
#+LATEX_HEADER: \renewcommand{\headrulewidth}{0pt}

#+OPTIONS: author:nil toc:nil title:nil date:nil H:4 num:2

#+LATEX_HEADER: \tolerance=1
#+LATEX_HEADER: \emergencystretch=\maxdimen
#+LATEX_HEADER: \hyphenpenalty=10000
#+LATEX_HEADER: \hbadness=10000

#+BEGIN_EXPORT latex
\begin{center}
\textbf{\Large{Contents}}
\end{center}
#+END_EXPORT

#+BEGIN_EXPORT latex
\contentsline {section}{\numberline {}{\emph{Preface}}}{xix}{section}%
\contentsline {section}{\numberline {}{\emph{Acknowledgements}}}{xxi}{section}%

\begin{center}
\textbf{Problem Solving with Python Programming}
\end{center}

\contentsline {section}{\numberline {1}{Computational Thinking}}{3--94}{section}%
\contentsline {subsection}{\numberline {1.1}Fundamentals of Computing}{3}{subsection}%
\contentsline {subsubsection}{\numberline {1.1.1}Variables}{3}{subsubsection}%
\contentsline {subsection}{\numberline {1.2}Identification of Computational Problems}{3}{subsection}%
\contentsline {subsubsection}{\numberline {1.2.1}Decision Problems}{3}{subsubsection}%
…
#+END_EXPORT
Everything is same as the normal template except the fact that I wrote LaTeX directly for the listings. It is pretty hard-coded, so every time the pages in the chapters change, I have to change the table of contents too.
#+BEGIN_EXPORT latex
\begin{center}
\textbf{\Large{Contents}}
\end{center}
#+END_EXPORT
This code block is present only at the title page but for the remaining I use the below template.
#+title: Table of Contents
#+LATEX_CLASS: extarticle
#+LATEX_HEADER: \usepackage[paperwidth=152.4mm,paperheight=228.6mm]{geometry}
#+LATEX_HEADER: \geometry{verbose,tmargin=25.95mm,bmargin=19.3mm,lmargin=16.2mm,rmargin=16.2mm}
#+LATEX_HEADER: \pagenumbering{roman}
#+LATEX_HEADER: \setcounter{page}{8}

#+LATEX_HEADER: \usepackage{fancyhdr}
#+LATEX_HEADER: \pagestyle{fancy}
#+LATEX_HEADER: \fancyhf{}
#+LATEX_HEADER: \renewcommand{\headrulewidth}{0pt}
#+LATEX_HEADER: \fancyhead[LE]{Contents}
#+LATEX_HEADER: \fancyhead[RE,LO]{\thepage}
#+LATEX_HEADER: \fancyhead[RO]{Contents}

#+OPTIONS: author:nil toc:nil title:nil date:nil H:4 num:2

#+LATEX_HEADER: \tolerance=1
#+LATEX_HEADER: \emergencystretch=\maxdimen
#+LATEX_HEADER: \hyphenpenalty=10000
#+LATEX_HEADER: \hbadness=10000

#+BEGIN_EXPORT latex
\contentsline {subsubsection}{\numberline {1.9.2}Shapes}{34}{subsubsection}%
\contentsline {subsection}{\numberline {}Solved Problems}{35}{subsection}%
…
#+END_EXPORT
Designing Front Matter
The other pages present in front matter includes title page, copyright, table of contents, preface, acknowledgments etc. For those all, I used the following template.
#+title: Dedication
#+LATEX_CLASS: extarticle
#+LATEX_HEADER: \usepackage[paperwidth=152.4mm,paperheight=228.6mm]{geometry}
#+LATEX_HEADER: \geometry{verbose,tmargin=19.3mm,bmargin=19.3mm,lmargin=16.2mm,rmargin=16.2mm}
#+LATEX_HEADER: \thispagestyle{empty}
#+LATEX_HEADER: \pagenumbering{roman}
#+LATEX_HEADER: \setcounter{page}{5}

#+OPTIONS: title:nil toc:nil author:nil date:nil H:3 num:nil

#+BEGIN_EXPORT latex
…content…
#+END_EXPORT
Finishing Up
With the above templates I created the front matter and content PDFs. Then combined them using Ghostscript. For about 500 pages, it came about 5 MB.
Conclusion
That was it. This was my path of ambiguities and errors to successfully publish the book. Success of the book itself is not known yet but I was more excited about the launch phase itself.
Will I use Emacs again if I had to publish another book? Pretty sure, once you are comfortable with the process, you are ready for another dose 😉.
I also frankly admit that there could have been a better way but I did what I could with the tight deadline. I’m open to ideas on how it can be improved 😁.
For a formal conclusion, hear me out. Book writing (means the text itself, not the formatting, LaTeX or Org mode) is a process where you (re)evaluate what you understood. I have heard the saying that if you can’t explain something to someone then you haven’t understood it in the first place. Leaving aside the rigorous rules, the saying is really apt.
Explaining the concepts like string slicing with negative indices were not so easy. I rewrote the paragraphs again and again until I felt confident that the words were easy. Sometimes I had to cross check my understanding to ensure that I don’t provide wrong information.
Definitions are a thing on another level. In my opinion a definition or a group of definitions must be as independent as possible. That is, you don’t want definitions to link to definitions and have the reader turn pages to connect them.
At such situations, I have found that using two definitions work better. First definition that is isolated and independent of other definitions and a second definition that links to other definitions.
Thanks for reading! If you have any comments, questions or suggestions feel free to reach me out using the links in footer. Have a nice day.
Notes
-
The website shows only the professor name because the publisher said that their convention is to use only the first author for copyright and website display. ↩